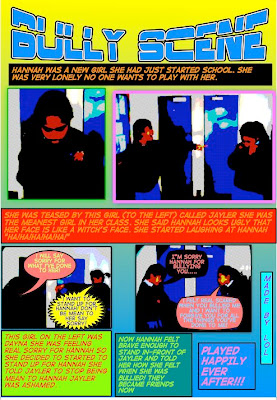
It's report time again and teachers are having to work with new report formats. If it has been created in Word the cells need to be individually set so that they won't get bigger as you type more.
Click in the cell, go to Table- Table properties. Click on the Row tab, go to Row Height is and change it from 'at least' to 'Exactly'
Tuesday, August 31, 2010
To show or hide margins in Word
Those 'grayed out' lines around your page are officially called 'Text Boundaries. Sometimes they can just appear like magic and you have no idea how they got there.
To Remove or Add Text Boundaries
Go to Word in the menu bar, click on Preferences -View and deselect 'Text Boundaries' if you do not want them to show, or select it if you do want them to show.
To Remove or Add Text Boundaries
Go to Word in the menu bar, click on Preferences -View and deselect 'Text Boundaries' if you do not want them to show, or select it if you do want them to show.
Wednesday, September 9, 2009
Print out in PowerPoint
A teacher asked me today how could she print out all of the slides on a PowerPoint presentation on one page which then lead me to show her the different ways that are available to print.
Wednesday, August 19, 2009
Pages, backgrounds and borders.
This is a slideshow I created for a lab lesson for Year 6 students (10-11 years old).
It has instructions on how to create backgrounds and borders for Pages.
It also includes instructions on how to upload these to Slideshare.
It has instructions on how to create backgrounds and borders for Pages.
It also includes instructions on how to upload these to Slideshare.
Writing And Publishing 2 Weeks
View more presentations from Jacqui Sharp.
Wednesday, August 5, 2009
Comic Life and cartoonise the Photos
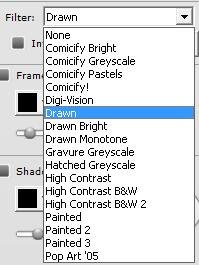
 If you have Comic Life work that have photos of children in them, but you do not want to have the children’s photos online. Publish them and protect anonymity by double clicking on each picture, click on the details button
 and used one of the filters to comicfy the pictures.
  Do this for each photo and the effect is that that you can still make out what the figures are doing, but you can't make out the faces.
Sunday, August 2, 2009
How to take a screen capture
There are four ways you can take a screen capture.
One will save the screen capture to your desktop.
The other will paste straight to what ever document you have open.
The third will take a screen capture of the window you have open.
The fourth will take a screen capture your whole screen.
Save to your desktop
(you need to do this one if you want to keep the image to use again, like avatars or pictures that you want to upload to a wiki or blog)
Process:
Press Shift-Command-4 on the keyboard .
.
Your mouse arrow will turn into a cross with a circle behind it.
Click and drag a rectangle shape around what you want to capture.
You will hear a camera click.
The picture will now be called Picture 1 and it will be on your desktop.
(If you are using this picture in a Wiki, make sure you rename it because if you upload another screen capture called Picture 1 then it will replace the one you have on your wiki and you won't be able to get it back.)
Paste straight to your document
Process:
Press Shift-Control-Command-4 on the keyboard .
.
Your mouse arrow will turn into a cross with a circle behind it.
Click and drag a rectangle shape around what you want to capture.
You will hear a camera click.
Go to the document you want to insert the image into.
Press Command-V.
You cannot paste into a Wiki or a Blog! Use Save to the desktop for that one.
Screen Capture of Window (thanks to @cheesynz)
Process:
Press Shift-Control-Command-4 on the keyboard, then press the Spacebar.
Your mouse arrow will turn into a Camera icon,
Click on the window that you want to capture
You will hear a camera click.
Go to the document you want to insert the image into.
Press Command-V.
Screen Capture of whole screen (thanks to @tonitones)
Process:
Press Shift-Command-3 on the keyboard.
You will hear a camera click.
Go to the document you want to insert the image into.
Go to Insert Picture button, click on Desktop and select picture (or drag it off the desktop onto the document
OR
Press Shift-Control-Command-3 on the keyboard.
You will hear a camera click.
Go to the document you want to insert the image into.
Press Command-V.
One will save the screen capture to your desktop.
The other will paste straight to what ever document you have open.
The third will take a screen capture of the window you have open.
The fourth will take a screen capture your whole screen.
Save to your desktop
(you need to do this one if you want to keep the image to use again, like avatars or pictures that you want to upload to a wiki or blog)
Process:
Press Shift-Command-4 on the keyboard
 .
.Your mouse arrow will turn into a cross with a circle behind it.
Click and drag a rectangle shape around what you want to capture.
You will hear a camera click.
The picture will now be called Picture 1 and it will be on your desktop.
(If you are using this picture in a Wiki, make sure you rename it because if you upload another screen capture called Picture 1 then it will replace the one you have on your wiki and you won't be able to get it back.)
Paste straight to your document
Process:
Press Shift-Control-Command-4 on the keyboard
 .
.Your mouse arrow will turn into a cross with a circle behind it.
Click and drag a rectangle shape around what you want to capture.
You will hear a camera click.
Go to the document you want to insert the image into.
Press Command-V.
You cannot paste into a Wiki or a Blog! Use Save to the desktop for that one.
Screen Capture of Window (thanks to @cheesynz)
Process:
Press Shift-Control-Command-4 on the keyboard, then press the Spacebar.
Your mouse arrow will turn into a Camera icon,
Click on the window that you want to capture
You will hear a camera click.
Go to the document you want to insert the image into.
Press Command-V.
Screen Capture of whole screen (thanks to @tonitones)
Process:
Press Shift-Command-3 on the keyboard.
You will hear a camera click.
Go to the document you want to insert the image into.
Go to Insert Picture button, click on Desktop and select picture (or drag it off the desktop onto the document
OR
Press Shift-Control-Command-3 on the keyboard.
You will hear a camera click.
Go to the document you want to insert the image into.
Press Command-V.
Subscribe to:
Posts (Atom)


